Building a Full-Stack Serverless URL Shortener
June 5, 2023I’m going to strengthen my fullstack serverless developer skills by building a clone of bitly.
This idea came from a conversation I had with a friend of mine, who hosts parties often and manage the invite lists with a Telegram chat. He wanted to create fancy invitations by embossing a link to the chat as a QR code, and to do that he needed to create a rubber stamp for the QR code.
Custom rubber stamps are pretty expensive, and so I suggested that the QR code point to a shortened URL. That way, he can change the URL later without creating a new stamp. To which he replied:
“I’ll use bitly to create the invite link, of course.”
Now don’t get me wrong, bitly is great for non-technical folks to create shortened URLs. However, especially after Heroku ended their free tier, I’ve learned that there’s no such thing as a free lunch. I’m immediately leery of any free service that services a lot of people without a very obvious market strategy behind it.
So, it’s about time I build my own URL shortener! I have plenty of use cases for it, it’s a great side project to learn how to write fullstack apps, and I can always open it up to my friends to use as well.
A Foray into Developer Journals
Inspired by Juraj Majerik’s diary of an Uber clone and David Smith’s design diary, my plan is to write short blog posts on the days I work on this project. In a perfect world, I’d like to devote at least an hour daily to this, but I’m aiming to make a post at least once a week until completion.
Architecture Overview
Before I get started, I drafted what I expect my tech stack to look like in broad strokes. Additional context I used:
- Unlike most side projects, this is one I hope to use personally going forward.
- At work, our stack is AWS and SST for infrastructure, and React and MUI for the frontend.
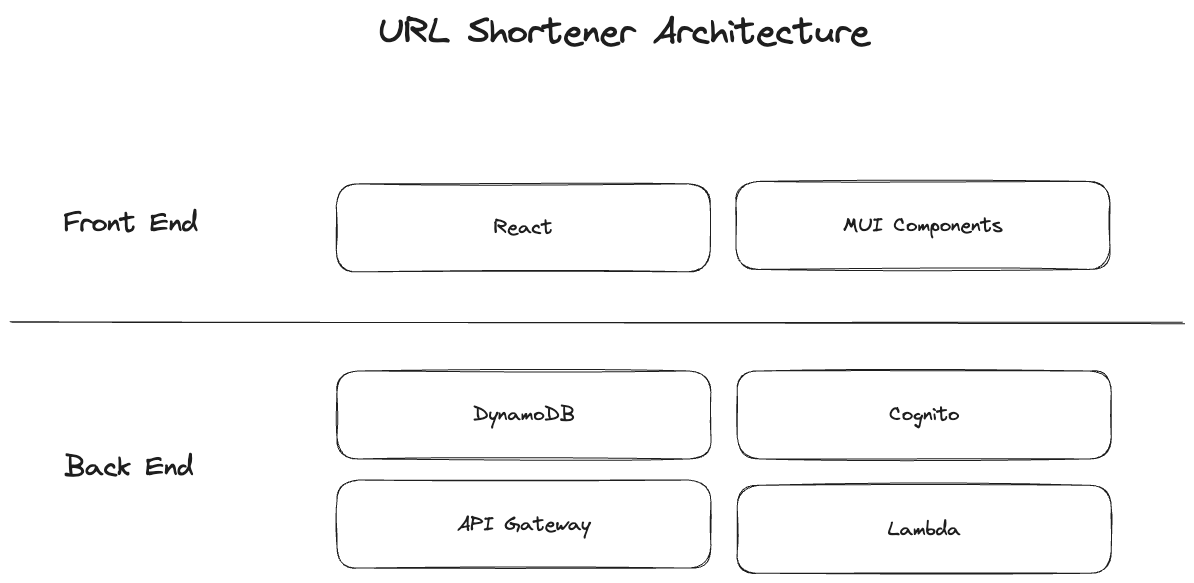
Here’s my plan for the architecture:
I’m going to use SST to manage the infrastructure and stitching all the pieces together. For the API backend, the data store will be a DynamnoDB mono-table, and the compute will be AWS Lambda functions behind an API Gateway. AWS Cognito will manage the user authentication and authorization.
I’m really excited to embark on this journey. By documenting my progress in short blog posts, I hope to share my experiences and insights with others who may be interested in similar projects. Stay tuned for future updates as I delve into the development process and bring this project to life. Let’s build something amazing together!